Fedora 16
Fedora 16 has been released for quite a while but I just now decided to make use of my old Acer Aspire 5572 notebook again and install the latest Fedora release. As always, Fedora is more or less equipped with “bleeding edge” software releases - which I appreciate a lot. (By the time of writing: once installed and completely updated you will be running kernel 3.1.7.) I’ve downloaded the default Gnome Live desktop installation media. Once burnt to CD and booted you’ll be a running a Fedora Live system with Gnome desktop. Yes, I like the new Gome 3 desktop!
There has been and still is a lot of controversial discussion going on about the latest Gnome release and about Ubuntu’s Unity as well. Both desktops are quite different from what we where used to and brake with a lot of our habits. But if you don’t like them, simply don’t use them, you do have a choice. And there are good alternatives available, like of course KDE, Xfce or LXDE which come with every major distro. Another two quite new alternatives would be Cinnamon (derived by Linux Mint’s MGSE, a set of extensions for and based on Gnome 3) and razor-qt (a lightweight desktop and like KDE based on Qt). Personally, I’d prefer if Ubuntu would stick to Gnome but at least it’s no problem to switch to it.
Installation
OK, back to Fedora. Once you’ve booted from the CD and Gnome is running, you may start the installer by moving the mouse in the upper left corner which will make a sidebar appear where you’ll find the shortcut to the installer. Hint: if you’d like your own localization as default in the installed system, log out from your live session and log in again, but choose you language first! (Haven’t tried though…). If you skip this you’ll end up with English local settings but of course you may change this once the system is installed. There is nothing new about the Fedora installer. It’ll sail you safely through all required steps from keyboard settings, time zone, partitioning, root password, etc… I’ll gave Fedora the whole harddisk and let the installer do it’s magic. If you follow this as well, you’ll have ext4 as filesystem and separate partitions for /boot, /, /home and of course swap. The latter three will make use of LVM if you haven’t stated otherwise. In addition to that there will be a small 1MB partition labled “BIOS_GRUB”. This is due to the fact that the installer will create a GPT partition layout which needs this workaround for non-EFI systems. (If you already have existing partitions you’ll be fine of course!) Only thing I changed was to make / and /home a little smaller to have space for a 100GB /media/data partition and change the filesystem type of /boot from ext4 to ext3. Once the installer starts copying you’ll have a few minutes - it’s really quick even on my old notebook! Once done you’ll need to reboot (be sure to boot from disk and not from the installation media again!). During the first boot you’ll get the chance to enable ntp and create a user. If this isn’t you’re first Fedora installation this won’t be new. After you’re done with that you may log in for the first time. I had some selinux warnings caused by my /media/data partition, but they disappeared after a full update (which will follow now…).
As the initial release of Fedora 16 is already a few months past there will be a lot of updates waiting. I’ll strongly suggest a wired connection to your router. Depending on your hardware and especially in case of a Broadcom WLAN interface like a BCM4318 in my notebook WLAN connections might be rather slow! We’ll fix this later. This is my recommendation for doing the first big system update. Open a terminal by pointing to the upper left corner of your screen, go to Applications -> System Tools -> Terminal. Switch to root and update yum and rpm (if updates are available):
1
2
3
4
$ su -
$ yum update yum
$ yum update rpm
$ exit
You might now as well use Fedora’s update tool, but I prefer to install big updates without X running. So, log out of your X session and press “Alt + F2” which will drop you to a console. Login as root and type
1
$ init 3
and login again as root (don’t know why, but this might take some time and you might even see some pam errors - never mind!) If you don’t have a login prompt, switch to another virtual console by hitting “Alt + F1” or “Alt + F3” (…you get the idea).
Now we’ll start the big update:
1
$ yum update
It’s time for a coffee, as this will take some time… Once done, reboot:
1
$ shutdown -r now
Now we’ll disable a few services which are not needed (unless you need FCoE or iSCSI) or were required during installation only:
1
2
$ svcs="livesys-late.service livesys.service iscsi.service iscsid.service fcoe.service"
$ for i in $svcs; do systemctl disable $i; done
As Fedora switched to systemd you’ll have to handle services now with systemctl command (in some cases it will redirect to the old chkconfig command). You might also want to start the firewall configuration tool (Applications -> Others -> Firewall) and close port 22 for sshd, as it’s not running anyway - unless you need it of course! ;-)
If you like to run TrueCrypt, it may be a good idea to grant your user a few sudoer privileges. To do so, add a file to /etc/sudoers.d/ (as root - of course - and don’t forget to replace “_
1
2
$ echo "ALL=NOPASSWD: /bin/mount *, /bin/umount *, /usr/bin/truecrypt *" >> /etc/sudoers.d/<YOUR_YOUSERNAME>
$ chmod 440 /etc/sudoers.d/<YOUR_YOUSERNAME>
Check as
1
$ sudo -l
If TrueCrypt is asking for a password: it’s your users password, not root’s!
Installing Google’s Chrome is a piece of cake and once installed, you’ll have a new yum repository by Google which will help you keep it up to date. Download the Google Chrome rpm for your computer’s architecture and install it as root by:
1
$ yum localinstall /path/to/google-chrome*.rpm
This will also install some dependencies required by Chrome.
Proprietary stuff
Fedora comes with GPL’ed software only. If you need stuff like mp3 playback or Nvidia proprietary driver you’ll have to enable rpmfusion as a new repository. This is done quite easily, just follow the instructions given here. You might want to consider verifying the gpg keys (this may help as well). I just installed the two RPM Fusion packages and then checked the keys /etc/pki/RPM-GPG-KEY-rpmfusion-*-fedora-16-primary. Now run as root:
1
$ yum update
This will update the two packages and import the gpg keys.
Nvidia driver
If you need Nvidia drivers you can install them by (see this also):
1
$ yum install kmod-nvidia
This will pull some dependencies and install everything you need. Also the nouveau driver will be blacklisted but in my experience that is not enough. So before rebooting we’ll build a new init ramdisk (but save the old one first):
1
2
3
$ mv /boot/initramfs-$(uname -r).img /boot/initramfs-$(uname -r).img_nouveau.bak
$ dracut /boot/initramfs-$(uname -r).img $(uname -r)
$ shutdown -r now
There are two things I like to configure as well: Disable the Nvidia logo at X start by adding
1
Option "NoLogo" "true"
to the “Device” section of /etc/X11/xorg.conf. And make the boot screen nicer by adding
1
GRUB_GFXPAYLOAD_LINUX=1280x800x32
to /etc/default/grub (make sure the resolution fits your screen and is supported by VESA!!! => in grub press “C” and then type “vbeinfo”). Now run:
1
$ grub2-mkconfig -o /boot/grub2/grub.cfg
Next time you reboot you should have the plymouth boot screen again.
B43 firmware
As already mentioned, WLAN connections are rather slow with (some) Broadcom WLAN interfaces. This is due to the use of an open source firmware binary which does not enable hardware en-/decryprion. You may run “dmesg” and should see something like this:
1
2
b43-phy0: Loading OpenSource firmware version 410.31754
b43-phy0: Hardware crypto acceleration not supported by firmware
Luckily we can install the “original” firmware by cutting it out of the Windows driver which makes WLAN come back to it’s usual speed. If not already installed, install b43-fwcutter:
1
$ yum install b43-fwcutter
Instructions are given here:
1
2
/usr/share/doc/b43-fwcutter-014/README.Fedora
/usr/share/doc/b43-fwcutter-014/README
and here https://www.linuxwireless.org/en/users/Drivers/b43#devicefirmware
To sum it up:
1
2
3
4
5
6
$ wget http://mirror2.openwrt.org/sources/broadcom-wl-5.10.56.27.3_mipsel.tar.bz2
$ tar xjf broadcom-wl-5.10.56.27.3_mipsel.tar.bz2
$ su
$ b43-fwcutter -w /lib/firmware broadcom-wl-5.10.56.27.3/driver/wl_apsta/wl_prebuilt.o
$ chmod 755 /lib/firmware/b43
$ rm -r broadcom-wl-5.10.56.27.3*
Reboot and run “dmesg” again. Now it should look like this:
1
b43-phy0: Loading firmware version 508.1084 (2009-01-14 01:32:01)
MP3 playback
To enable mp3 playback and have all codecs installed I tend to simply install every gestreamer-plugins-* package I find… ;-) (Applications -> System Tools -> Add/Remove Software)
Gnome 3 tweaking
Now for Gnome 3. If you want to give Gnome 3 a try, there are a few things which might be of help. Tweaking the appearance is not made easy, but there are tools and extensions which are very helpful. First check settings in Gnome’s system settings:
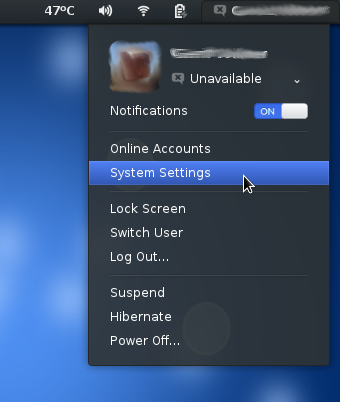
…and set them as you wish. Now I’d install a few Gnome extensions. You can install them all but enable only the ones you like:
1
$ yum install gnome-tweak-tool gnome-shell-extension-*
To make the “user-theme” extension work, we need to edit a file first. As root open
1
/usr/lib/python2.7/site-packages/gtweak/tweaks/tweak_shell.py
with your favorite editor and change line 46 from
1
THEME_EXT_NAME = "user-theme@gnome-shell-extensions.gnome.org"
to
1
THEME_EXT_NAME = "user-theme@gnome-shell-extensions.gcampax.github.com"
Found this solution here. You might have to log out and in again. Now press the “Windows” key which will bring up the search field in the upper right, type “tweak” and start “Advanced Settings”:
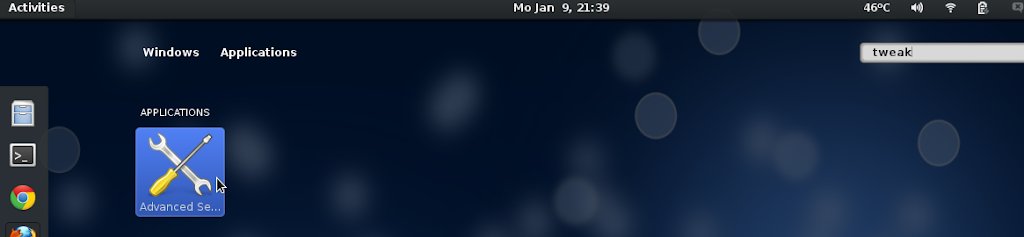
I think most options are self explaining. For some of them to work, you’ll have to restart the shell (“Alt + F2”, type “r”). In “Shell” tab I’d set “Arrangement of buttons on the titlebar” to “All” and I’d enable the “User Themes Extension” and “remove-accessibility-icon Extension” in “Shell Extensions” tab. The first one makes installing/enabling Gnome Shell themes really easy. Simply extract them to your ~/.themes directory and enable them in “Theme” tab. I recommend two very nice GTK3/2 + Gnome Shell themes: Zukitwo and Ambiance Blue (see the latter in my screenshots).

If not already installed, you’ll need those three packages to make those themes work:
1
$ yum install gtk-unico-engine gtk-murrine-engine gtk2-engines
So far everything is working pretty good and I think Fedora 16 is a fine release. Only thing: from time to time shutting down the computer takes quite long (just be patient, it’ll shut down properly). Until now I haven’t found out why…
That’s about all I remember right now… Ah, one additional thing maybe: Rhythmbox gave me a hard time scanning music files as the scan process seemed to crash every few minutes. So I installed Banshee which works pretty good! And of course LibreOffice and Gimp are missing on the Live CD, so you might want to install those, too (Applications -> System Tools -> Add/Remove Software).
As always, have fun!