Migrating from Wordpress to Jekyll
This blog has seen a couple of Wordpress releases and for a short period was even hosted on Blogger. Since comments are disabled it’s a pretty static website and I found that Wordpress is kind of an overkill. It’s still a great CMS, but really more than I currently require. Also - as it’s very wide spread - security issues are exploited quite often. When I came across Jekyll I wasn’t really intrigued at first, but after a while I thought I’d give it try…
…and I did. Luckily there’s a way to migrate your current posts and pages to Jekyll. However - at least in my case - I had to go over each post and check its formatting as not everything was displayed nicely in html. Posts written with current versions of Wordpress looked much nicer than the older ones. Anyway, this gave me a chance to read this old stuff again - kinda funny.
Please note that Jekyll will not be as easy on you as Wordpress is. You will probably have to work your way through some obstacles, do some research and read documentation.
I’d recommend reading at least the basic documentation on Jekyll’s website and see for yourself if this is something you might like to use.
Migration
In order to migrate from Wordpress to Jekyll I made use of Exitwp. It works quite nicely by converting all of your Worpress posts and pages to markdown. Also your categories and tags will be transfered correctly. To install Exitwp simply follow the instructions given on the Github page. For Ubuntu 20.04 install a few prerequisites (python2 should already be installed) and clone the Github repository:
1
2
$ sudo apt install python-yaml python-bs4 html2text git
$ git clone https://github.com/thomasf/exitwp.git
This will leave you with a new sub-directory exitwp-master.
Login to your Wordpress blog, go to “Tools -> Export”, select “All content” and klick “Download Export File”. Copy the downloaded xml file to exitwp-master/wordpress-xml and run the converter:
1
2
$ cd exitwp-master
$ python2 exitwp.py
You will find all pages/posts converted to markdown in exitwp-master/build.
Installation
To install Jekyll follow the instructions given here and/or here. You can install Jekyll on nearly all Linux operating systems, MacOSX and - though not officially supported - even Windows. You will basically install Ruby and then install Jekyll and Bundler as gems.
Working with Jekyll
Start a new blog
To actually start working on your migrated Wordpress blog let’s first create a new Jekyll project:
1
$ jekyll new myblog
You might be asked for sudo/root password, hit Ctrl+C instead and then run:
1
2
3
4
5
$ cd myblog
$ bundle config set --local path 'vendor/bundle'
$ bundle install
$ bundle add webrick
$ bundle exec jekyll serve
and point you browser to http://127.0.0.1:4000/.
Now copy all your posts from _posts/ directory within your migrated exitwp-master/build/ to your new myblog/_posts/ directory. Also copy all page directories to myblog/. Refresh your browser and you should already see your migrated content.
Most likely you will have also have images or files uploaded to your Wordpress blog. Simply download the complete wp-content/uploads folder from your current Wordpress installation and copy the complete content of uploads/ to myblog/assets/images/ by keeping the folder structure. Then run sed over all your markdown formatted posts. In my case:
1
2
$ cd myblog/_posts
$ sed -i 's/https:\/\/www.funzt.info\/wp-content\/uploads/\/assets\/images/g' *.markdown
…and all of your links will be fine again :-)
Configuration
Jekyll comes with a very basic theme. Of course you can stick with it and customize it. I opted for Minimal Mistakes theme. It is very well documented and the developer seems to be really taking care. Either way you need to edit the configuration file _config.yml now. (I found that the default generated _config.yml file had Windows line brakes - pretty annoying. So dos2unix might not hurt…). If you’d like to make use of Minimal Mistakes theme add
1
gem "minimal-mistakes-jekyll"
to your Gemfile and run:
1
$ bundle
Also add
1
2
theme: minimal-mistakes-jekyll
minimal_mistakes_skin: "default" # "default", "air", "aqua", "contrast", "dark", "dirt", "neon", "mint", "plum", "sunrise"
to your _config.yml.
To generate category and tag archives add
1
  gem "jekyll-archives"
to the “group :jekyll_plugins do” part of your Gemfile and
1
  - jekyll-archives
to the list of plugins in _config.yml. Then follow this guide. If you decided to make use of this theme I highly recommend reading through its documentation.
Editor
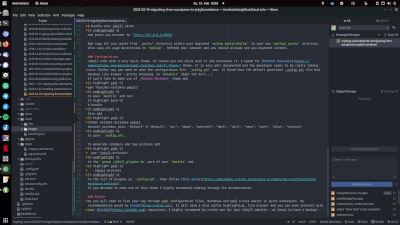
As you will need to find your way through yaml configuration files, markdown and html a nice editor is quite convenient. My recommendation would be Atom.
It will have a nice syntax highlighting, file browser and you can even interact with your Github repository. I highly recommend to create one for your Jekyll website - at least to have a backup!
You will probably have to check all your posts and pages now and see if they look nice. exitwp did a good but not perfect job in my case. So I went over all generated markdown files and modified them where required. Atom will be a nice editor for that job.
Deployment
Once your satisfied use Jekyll to generate a deployable version of your blog by
1
$ JEKYLL_ENV=production bundle exec jekyll build
You will find everything you need in myblog/_site. Copy its content to your webserver’s root directory and you’re done.
So this actually is the first post written with Atom and deployed by Jekyll!
