sidux 2009.2
![]()
On July 15th sidux 2009.2 was released. I was looking forward to this release because it’s the first one with KDE4 and I didn’t wanted to go through the hassle of updating from KDE3… For those who haven’t heard of sidux: it’s a Debian sid (the unstable branch of Debian) based distro and 100% compatible with Debian sid. In fact it uses sid’s repositories together with sidux’ own repositories. The latter provide bugfixes to some broken packages in sid, sidux artwork, some tools unique to sidux and of course the sidux kernel (which might update quite frequently). sidux has a rolling release cycle which means, you may update to each next “release” by just updating through Debian’s apt-get. As the homepage says: sidux is “Debian hot and spicy!”. But most of all it makes running the unstable Debian sid quite stable.
I ran sidux on my main desktop for a long time (read this article) before I switched to Ubuntu again (I tend to change distros from time to time ;-) ). But now I wanted sidux back, this time on my laptop. It’s an Acer Aspire 5572Z WXMi, Intel based video controller and sound card, Broadcom wlan and Marvell ethernet controller. Since two years it’s hardware is very well supported by all distros I have found. Of course, WLAN doesn’t work out of the box, so during installation of a Linux distro I use a wired ethernet connection.
Installing sidux is quite fast and straight forward. Download the iso (I go for the DVD full image, which provides i686 and amd64 arches of sidux), burn it and boot from the newly created CD/DVD. Choose your language from the grub menu by pressing “F4”, choose the desired kernel/architecture and on you go.
This will bring you to a very nice looking KDE4 desktop. There is a small bug though: the release notes which show up still read “Preview of sidux 2009.02…” - don’t worry, it is the final! You may now install sidux to your harddrive by selecting the install button on the desktop. The first step is to select and if necessary create the partitions to install sidux to. To create new partitions you may use the graphical gparted by clicking the button on the left. In my case I chose to create a 2048MB partition as swap, 512MB as ext3 for /boot and seperate / and /home, both formated with ext4. (Please note: sidux doesn’t recommend using ext4 for now! As I didn’t encounter any problems with ext4 so far I opted for it. I don’t know if it’s really necessary but it’s recommended to create a seperate /boot partition with ext3 then.) Once those partitions are created and you close gparted the installer will be back and you can choose mountpoints now. Be aware that only the root-partition will be formated by default. I guess it would be nice to add checkboxes to the other partitions to have them formated, too. For now, you have to format them manually if you want. If you like to make use of lvm you need to take care of it yourself, too. Continuing with the installer you will be asked the usual stuff: timezone, root password, user, grub etc… The actual installation is very quick then: it took about 6 minutes on my laptop. Once done: reboot!
After logging into KDE4 I recognized that no network interface was configured. Doing so is quite easy though: go to KDE Menu -> Internet -> CENI. It’s a text based network configuration tool and very simple to handle, so I configured the wired ethernet connection. To make things easier I installed network-manager:
1
$ apt-get install network-manager-kde
You may then need to edit /etc/network/interfaces and comment out every configured interface with the exception of “lo”. For example:
1
2
3
4
5
6
7
8
9
10
11
# The loopback network interface
auto lo
iface lo inet loopback

#auto eth0
#iface eth0 inet dhcp
#
#auto wlan0
#iface wlan0 inet dhcp
#       wpa-psk XXXX
#       wpa-ssid Nostromo07
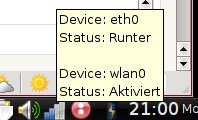
Now reboot and you may configure your interfaces with the KDE NetworkManager applet now:
To make my Broadcom WLAN card work I installed b43-fwcutter. (You need to add contrib and non-free to /etc/apt/sources.list.d/debian.list, and “contrib non-free fix.contrib fix.non-free” to /etc/apt/sources.list.d/sidux.list - or see smxi below.)
If you’re new to Debian or sidux I’d recommend using smxi for system maintenance and updates. As sid is the unstable branch of Debian there’ll be a lot of updates (but you’ll always have current software! :-) ). smxi is a very helpful script, which does some basic software repository configuration and helps installing proprietary software drivers, too. It’s not part of sidux but it’s more or less written for sidux (and other Debian based distros) - and works really great! To install follow the instructions given here or just do as root:
1
2
$ cd /usr/local/bin && wget -Nc smxi.org/smxi.zip && unzip smxi.zip
$ rm /usr/local/bin/smxi.zip
Now invoke “smxi” as root and it’ll tell you what to do! I’ve always used smxi with great success but this time I wanted to see if I can do without help… So, after the network was configured I decided to remove the kernel metapackages. (Note: don’t follow this if you’re using smxi as it takes care of everything!) Those metapackages make sure you’ll always get the latest sidux-kernel. So, don’t do that unless you wan’t to take care of kernel updates yourself! As I like to install my own kernel I don’t rely on the sidux updates, so I removed those metapackages. Find them by
1
$ dpkg --get-selections | grep 2.6-sidux-
and remove them by
1
$ apt-get purge <package-name>
Once done I took a look at the sidux website to see if there are any update warnings (again: if you’re using smxi, it’ll take care of that, too!) As everything seemed fine I did the first update (of course as root):
1
2
3
4
5
$ apt-get update
$ apt-get -d dist-upgrade #this downloads the new packages only
$ init 3 (update without X!)
$ apt-get dist-upgrade
$ reboot
So, this left me with an updated sidux - with the exception of the kernel. I like to build my own kernel packages, which basically come from slh’s sidux kernel, but I try to strip it down a bit and omit modules I’m sure I don’t need. Building your own kernel for Debian is quite easy, you may follow this and/or use an updated “custom-kernel” script which I wrote to automate this process (download here). If you build your own kernel you’ll need to take care of some modules, too. For example, as I’m running VirtualBox from time to time I needed to compile a new kernel module:
1
2
$ apt-get install virtualbox-ose-source module-assistant
$ module-assistant
Select “PREPARE” first, then “SELECT” virtualbox-ose. This will build and install a matching kernel module.
I like sidux a lot. It’s cutting edge, has all the benefits of Debian plus those developed by the sidux maintainers. If you take a sharp look at the dist-upgrades, have an eye on the sidux website/forum and obey two simple rules: update in runlevel 3 and use apt-get for package management only! Please keep in mind though, that sometimes some things may brake - it’s based on Debian sid after all… Usually it doesn’t take long until sidux or Debian provide fixes. I wouldn’t recommend sidux to absolute Linux beginners, but maybe for the ambitious newcomer. :-)
This is a screenshot of my current desktop (I switched to qt-curve style):

You can take a look at the default desktop here.