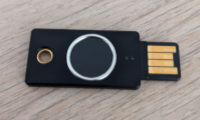
LUKS2 + YubiKey Bio
Recently I got myself a YubiKey Bio which I wanted to replace the YubiKey 5 with in terms of unlocking my LUKS2 encrypted drive(s). In this setup you can then simply use your fingerprint to unlock the drive, which I consider more secure than entering a PIN. I’m not sure if it’s a good idea to add multiple FIDO2 keys to systemd’s cryptsetup - I read about some issues - so I removed the YubiKey 5 first.
I consider you have already setup your YubiKey Bio by adding fingerprints. If not, follow the official instructions provided by Yubico.
Removing YubiKey from LUKS2 drive
Please remember to always have a backup key in place and make sure you really delete the intended key!! Backup important data first!!!
For some of the operations below it will require you to enter a remaining LUKS2 passphrase (i.e. the one corresponding to slot “0”).
As said, I first removed the old YubiKey 5 from the LUKS2 partition. Get an overview of the currently used key slots by:
1
$ sudo cryptsetup luksDump /dev/<DEVICE>
You should at least see 2 key slots in use and one Token called “systemd-fido2” probably with id “0”. In may case slot 0 is my really long password which I use as backup in case my key is not available and slot 1 is the YubiKey. In order to get rid of the YubiKey you’ll have to delete the token and the key slot:
1
2
$ sudo cryptsetup token --token-id <TOKEN-ID> remove /dev/<DEVICE>
$ sudo cryptsetup luksKillSlot /dev/<DEVICE> <KEYSLOT>
Depending on your setup: TOKEN-ID=0 and KEYSLOT=1. You can verify that slot and token are now removed by running luksDump again.
Adding Yubikey Bio to LUKS2 drive
If you followed this post you know how to add a YubiKey 5 which then requires you to enter a PIN and touch the key in order to unlock the drive. With the YubiKey Bio you cannot enter a PIN. So, when I just used the same commands I was left with a prompt to enter a PIN at boot - which of course did not work and had to use my backup key to complete the boot process. For the YubiKey Bio we need some additional options when setting it up.
First, check if your key is detected:
1
2
3
$ systemd-cryptenroll --fido2-device=list
PATH         MANUFACTURER PRODUCT
/dev/hidraw5 Yubico       YubiKey FIDO
If so, go ahead and add it as key to the encrypted partition:
1
sudo systemd-cryptenroll --fido2-device=auto /dev/<DEVICE> --fido2-with-client-pin=no --fido2-with-user-presence=yes --fido2-with-user-verification=yes
--fido2-with-user-presence=yes is the default anyway, but the important part is to disable the PIN --fido2-with-client-pin=no and enable the user verification --fido2-with-user-verification=yes. You can verify by running luksDump again and you will notice the following in the “Token” part of the output:
1
2
3
4
5
6
fido2-clientPin-required:
            false
fido2-up-required:
            true
fido2-uv-required:
            true
If you just replaced a YubiKey you’re done at this point. If you’ve added the YubiKey for the first time for the running OS, you will have to edit /etc/crypttab by appending fido2-device=auto and create a new initramfs, in case of Fedora by executing sudo dracut -f or for Debian sudo update-initramfs -u.
Now, when booting up your Linux system it will simply wait at some point (there will not be a prompt!) and the YubiKey Bio LED is flashing. Tab it with the configured finger(print) and it will boot up. If the YubiKey is broken or lost, simply wait a couple of seconds and you will get a prompt to enter your (backup) password.
